You may have noticed in my "secret" Christmas Quilt (on previous blogs) that none of my points on the stars have been 'cut off'. I just love this!! they look perfect and it is all thanks to a relatively new technique of making flying geese units where all four flying geese units are made at once, which is perfect for a star block since you require four matching flying geese units per star block. So I will take you through what I did. This is not my own method and one that I learnt. First of all you need a square of your 'background' fabric and four smaller squares of your 'points' fabric. What size will depend on the finished size you are after. Here are some examples:
* For a finished unit of 4 1/2" x 8 1/2", you will need a 9 1/4" large 'background' square and four small 'points' fabric squares of 4 7/8".
* For a finished unit of 2" x 3 1/2", you will need a 4 1/4" large 'background' square and four small 'points' fabric squares of 2 3/8".
I wanted flying geese units that ended up 3 1/2" x 6 1/2" unfinished. So by my reckoning, you need a large square cut at 3/4" larger than the length of the unit (i.e. for 6 1/2" length, you need a large square that is 7 1/4"). To calculate the size of the smaller square I guessed that you need to add 3/8" to the width of what you want your flying geese unit to be (i/e for a 3 1/2" wide flying geese unit, the smaller squares needed to be 3 7/8"). This size unit was needed for a 12" ohio star block.
I trialled this size on my first block and found that it was only just but this is usually how books give you the sizing. My preference is to make flying geese units a big bigger and then trim them back to the correct size so that they are perfect! i find no matter how careful I sew and iron, they tend to come out looking a little warped........so I added a 1/4" to the size of each of the squares and this worked out perfectly for the unit I was doing.

So you can see that
I have cut a 7 1/2" 'background' square, and four 4 1/8" 'point' squares.

On the back of the smaller or 'point' fabric squares, draw a diagonal line from corner to corner in pencil. It is best to put each block onto a piece of sand paper to keep it firm and prevent distorting whilst doing this. Also using a 2B pencil makes the job easier. A permanent marker could also be used if you wish.

Now place two of the smaller squares on opposite corners of the larger square, with right sides together, as shown. The outer corners and sides of the small and large squares should match, with some overlap of the smaller squares in the middle. The drawn line should line up so that it extends down the diagonal of the larger square, from corner to corner.

Stitch a seam 1/4" from the pencil line, on both sides.

Cut, using a rotary cutter and ruler, on the pencil line.

Press the 'points' fabric out so it looks like those in the photo.

Now lay another of the small squares on the corner of the large 'background' piece so that the right sides are together and the pencil line extends from the corner of the 'background' fabric to the point between the two small triangles, as shown.

Again stitch 1/4" from the drawn line, on both sides of the line. Repeat this with the other unit and the last remaining small square.


Cut on the drawn line using a ruler and rotary cutter. Repeat for both units and you will finish up with 4 flying geese units as shown. These will still have their dog ears and still require trimming.
 Trimming
: This is a little tricky to explain so hang in there. I used a 6 1/2" square ruler as this was the width of the unit I needed to trim to and made things a little easier.
Your aim is to trim your unit back to 3 1/2" x 6 1/2".
When you are doing this you need to make sure that there is a 1/4" above the top of the point and that the 3 1/2" outside marks on the ruler (where the bottom corners of the unit will be)are on the fold of the two different fabrics. I hope you understand.
Holding the ruler firm, I cut the side, top and side of the unit.


Then I swivelled the ruler and unit around (or change your body position if working on a corner of your table, lined up the 3 1/2" mark on the ruler with the now freshly trimmed top of the unit and trimmed off the excess at the bottom of the unit. Repeat this to all four units. They now look their best - nice and neat.


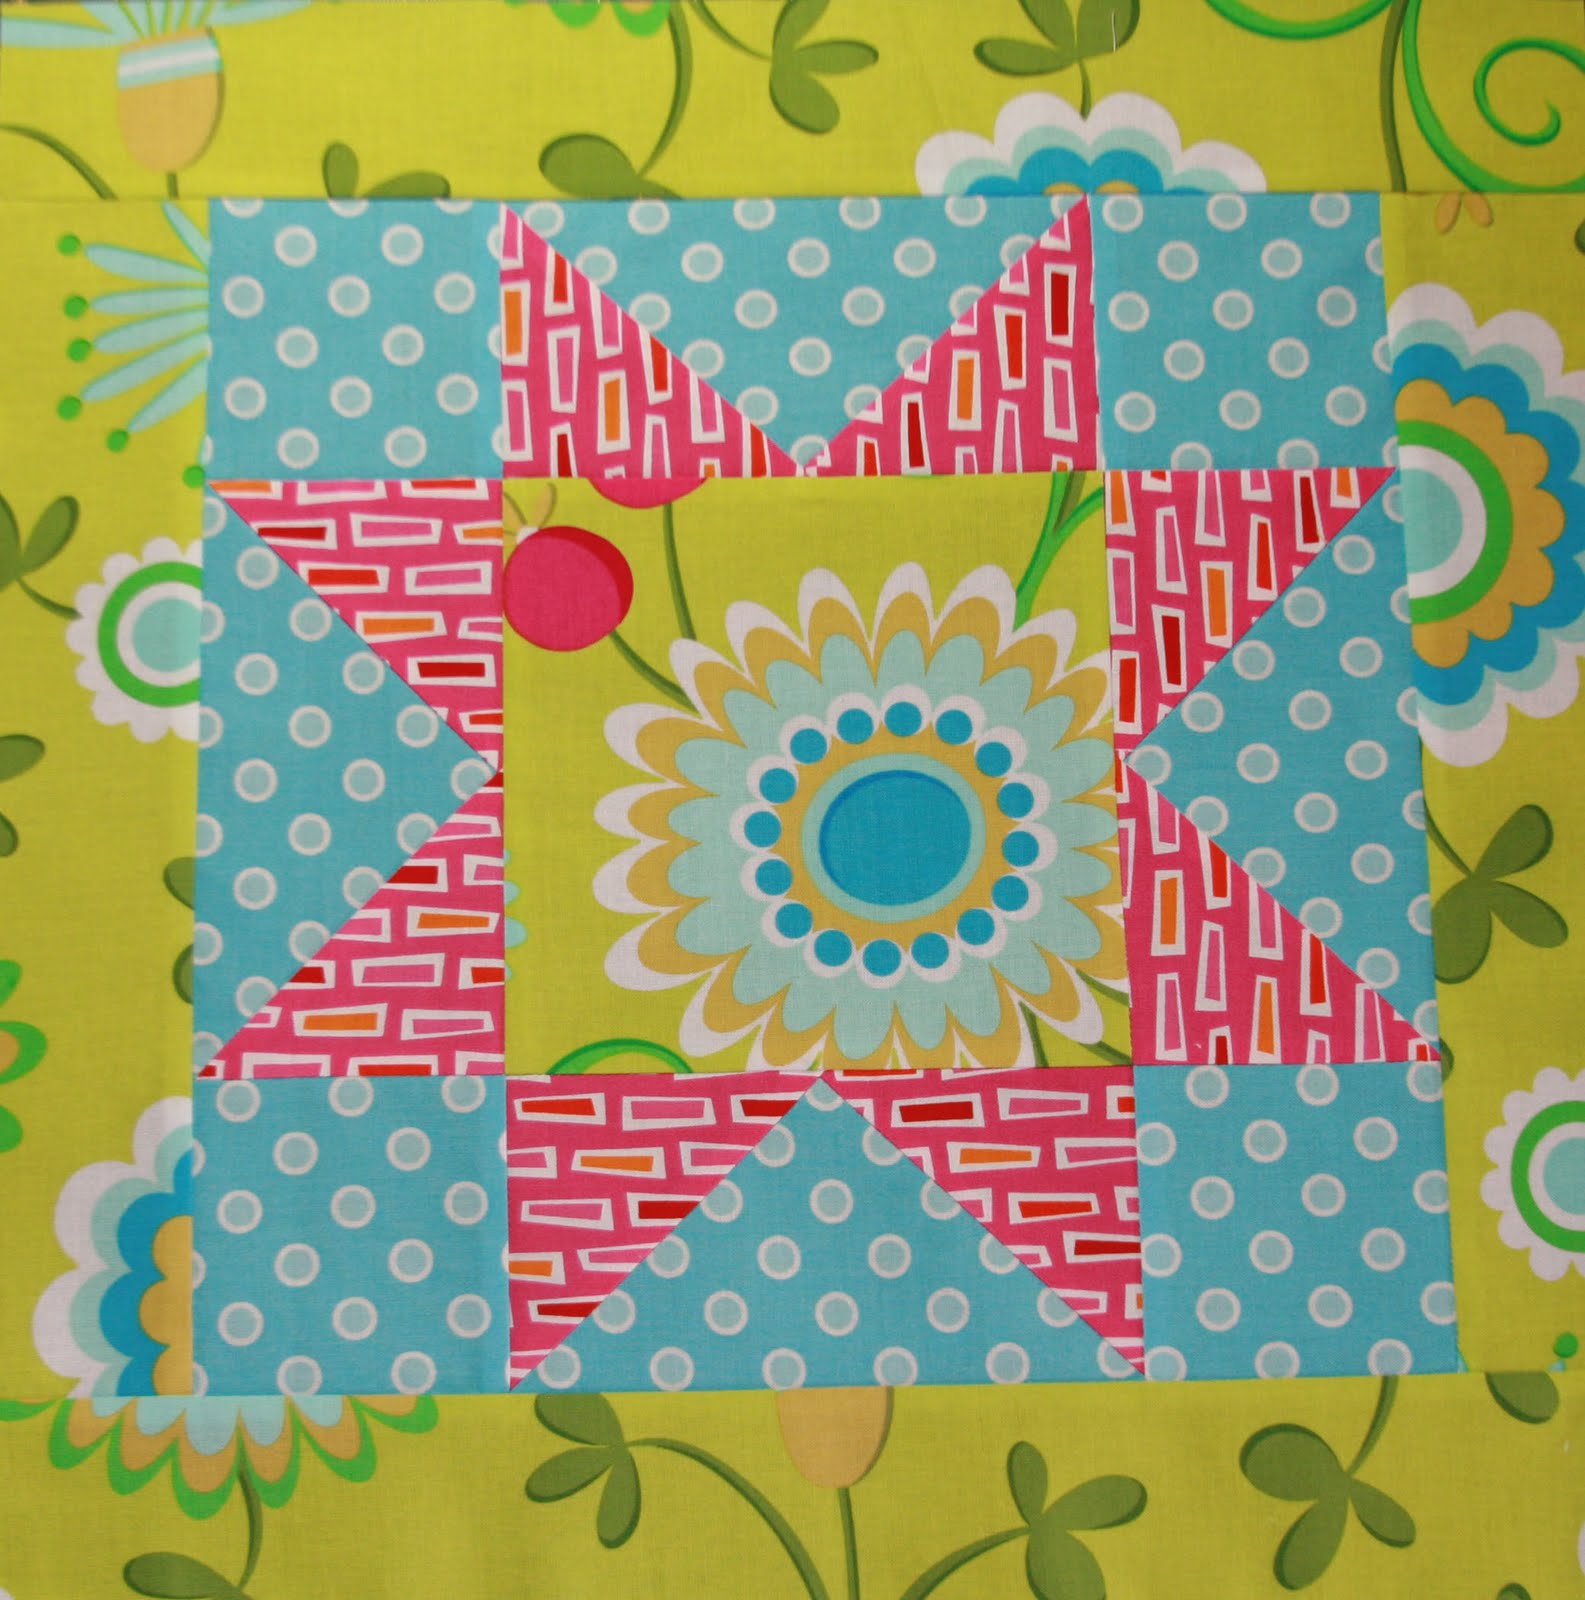
Finally this is how the flying geese units look as part of a block. Good luck with your flying geese units. Let me know how you go and don't hesitate to ask questions. I will try to help :).
Bonnie
 So you can see that I have cut a 7 1/2" 'background' square, and four 4 1/8" 'point' squares.
 On the back of the smaller or 'point' fabric squares, draw a diagonal line from corner to corner in pencil. It is best to put each block onto a piece of sand paper to keep it firm and prevent distorting whilst doing this. Also using a 2B pencil makes the job easier. A permanent marker could also be used if you wish.
 Now place two of the smaller squares on opposite corners of the larger square, with right sides together, as shown. The outer corners and sides of the small and large squares should match, with some overlap of the smaller squares in the middle. The drawn line should line up so that it extends down the diagonal of the larger square, from corner to corner.
 Stitch a seam 1/4" from the pencil line, on both sides.
 Cut, using a rotary cutter and ruler, on the pencil line.
 Press the 'points' fabric out so it looks like those in the photo.
 Now lay another of the small squares on the corner of the large 'background' piece so that the right sides are together and the pencil line extends from the corner of the 'background' fabric to the point between the two small triangles, as shown.
 Again stitch 1/4" from the drawn line, on both sides of the line. Repeat this with the other unit and the last remaining small square.

 Cut on the drawn line using a ruler and rotary cutter. Repeat for both units and you will finish up with 4 flying geese units as shown. These will still have their dog ears and still require trimming.
 Trimming: This is a little tricky to explain so hang in there. I used a 6 1/2" square ruler as this was the width of the unit I needed to trim to and made things a little easier. Your aim is to trim your unit back to 3 1/2" x 6 1/2".
When you are doing this you need to make sure that there is a 1/4" above the top of the point and that the 3 1/2" outside marks on the ruler (where the bottom corners of the unit will be)are on the fold of the two different fabrics. I hope you understand.
Holding the ruler firm, I cut the side, top and side of the unit.
Trimming: This is a little tricky to explain so hang in there. I used a 6 1/2" square ruler as this was the width of the unit I needed to trim to and made things a little easier. Your aim is to trim your unit back to 3 1/2" x 6 1/2".
When you are doing this you need to make sure that there is a 1/4" above the top of the point and that the 3 1/2" outside marks on the ruler (where the bottom corners of the unit will be)are on the fold of the two different fabrics. I hope you understand.
Holding the ruler firm, I cut the side, top and side of the unit.


 Then I swivelled the ruler and unit around (or change your body position if working on a corner of your table, lined up the 3 1/2" mark on the ruler with the now freshly trimmed top of the unit and trimmed off the excess at the bottom of the unit. Repeat this to all four units. They now look their best - nice and neat.

 Finally this is how the flying geese units look as part of a block. Good luck with your flying geese units. Let me know how you go and don't hesitate to ask questions. I will try to help :).
Bonnie
Finally this is how the flying geese units look as part of a block. Good luck with your flying geese units. Let me know how you go and don't hesitate to ask questions. I will try to help :).
Bonnie